I was honored to facilitate lesson study with IM1 teachers today. Their students are struggling (due to high EL/SPED population) with solving word problems. I dug deeper, and we decided the struggle is really the first step: creating equations from situations.
We decided our goal as educators this year is to work on teacher clarity: making our lessons streamlined and very goal-oriented. If we know our goals for the lesson, then every move we make (every breath we take…) is for the goal. So how do we clarify translating context to equations?
We started from the end: the benchmark. We took a problem the students struggled with, and tweaked it several times, each time only altering only one component. Students had to work from the original version (which we used simple numbers to keep it accessible) for each new “version”. They discussed what changed from situation to situation and how that affected the prior equation.
Version 1: Troy works for an ice cream cart vendor. He receives $10 for taking the cart out for a shift, plus a commission of $2.00 for each item he sells. Troy worked a shift Saturday and earned $60. How many items did he sell?
Version 2: Troy works for an ice cream cart vendor. He receives $15 for taking the cart out for a shift, plus a commission of $2.00 for each item he sells. Troy worked a shift Saturday and earned $60. How many items did he sell?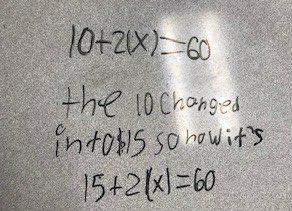
Version 3: Troy works for an ice cream cart vendor. He receives $15 for taking the cart out for a shift, plus a commission of $1.25 for each item he sells. Troy worked a shift Saturday and earned $60. How many items did he sell?
Version 4: Troy works for an ice cream cart vendor. He receives $25 for taking the cart out for a shift, plus a commission of $0.10 for each item he sells. Troy worked a shift Saturday and earned $52.90. How many items did he sell? (Problem from the benchmark.)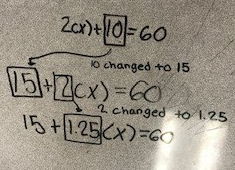
We used 3 scenarios. In each, we kept our questions as consistent as possible (again, clarity):
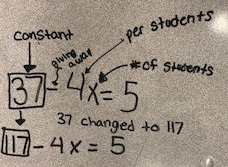
- Which part is varying (changing)? How do you know?
- Which quantity would be the coefficient? How do you know?
- Which quantity would be the constant? How do you know?
- (From version to version) What has stayed the same? What changed? How does the changed quantity affect our equation? Why?
Students were engaged, writing on their tables and willing to discuss with each other. They had many moments of “ohhhhhh” and “oops!” and learned quite a bit about the components of 2-step equations. They definitely need more time, and the teachers have committed to continuing the work as warm-ups or on modified days.
Oh! And did I mention this was a co-taught Special Ed class, with many English Learners?! Amazing!
So our major takeaways were: 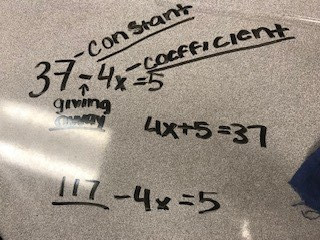
- Know your goal!
- Keep your goal in mind when creating the tasks/lesson and questions for clarity and focus.
- Breaking the situations into translating and solving (working on a single component) allows students to focus and interpret.
Below is our ppt. Hope it is useful! Happy Math-ing!
Linear Equations in Context LS 8.27.19
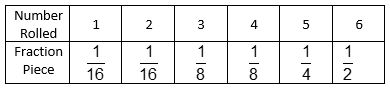
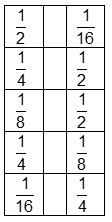 actions from the Fraction Kit and tell me which one was smaller and why. They were the same ones I used yesterday. He didn’t notice!
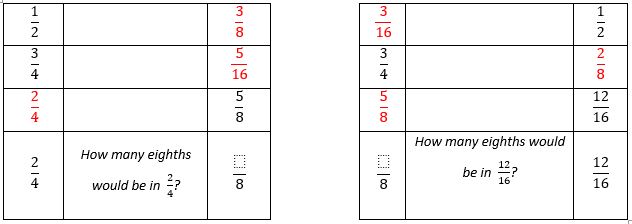 I often asked, How many ________ would you need to make them equal?, just to start the seed of equivalent fractions (Day 5). I threw at him two unit fractions (1/2 and 1/7) to see if he could apply his understanding without always using the Fraction Kit pieces.
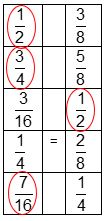 I often asked, How many more of ____ would you need to make them equal?, just to start the seed of equivalent fractions (Day 5). Then I threw a pair of equivalent fractions in our set to see what he would do. (He rolled his eyes and said they were equal. Duh, Mom!)
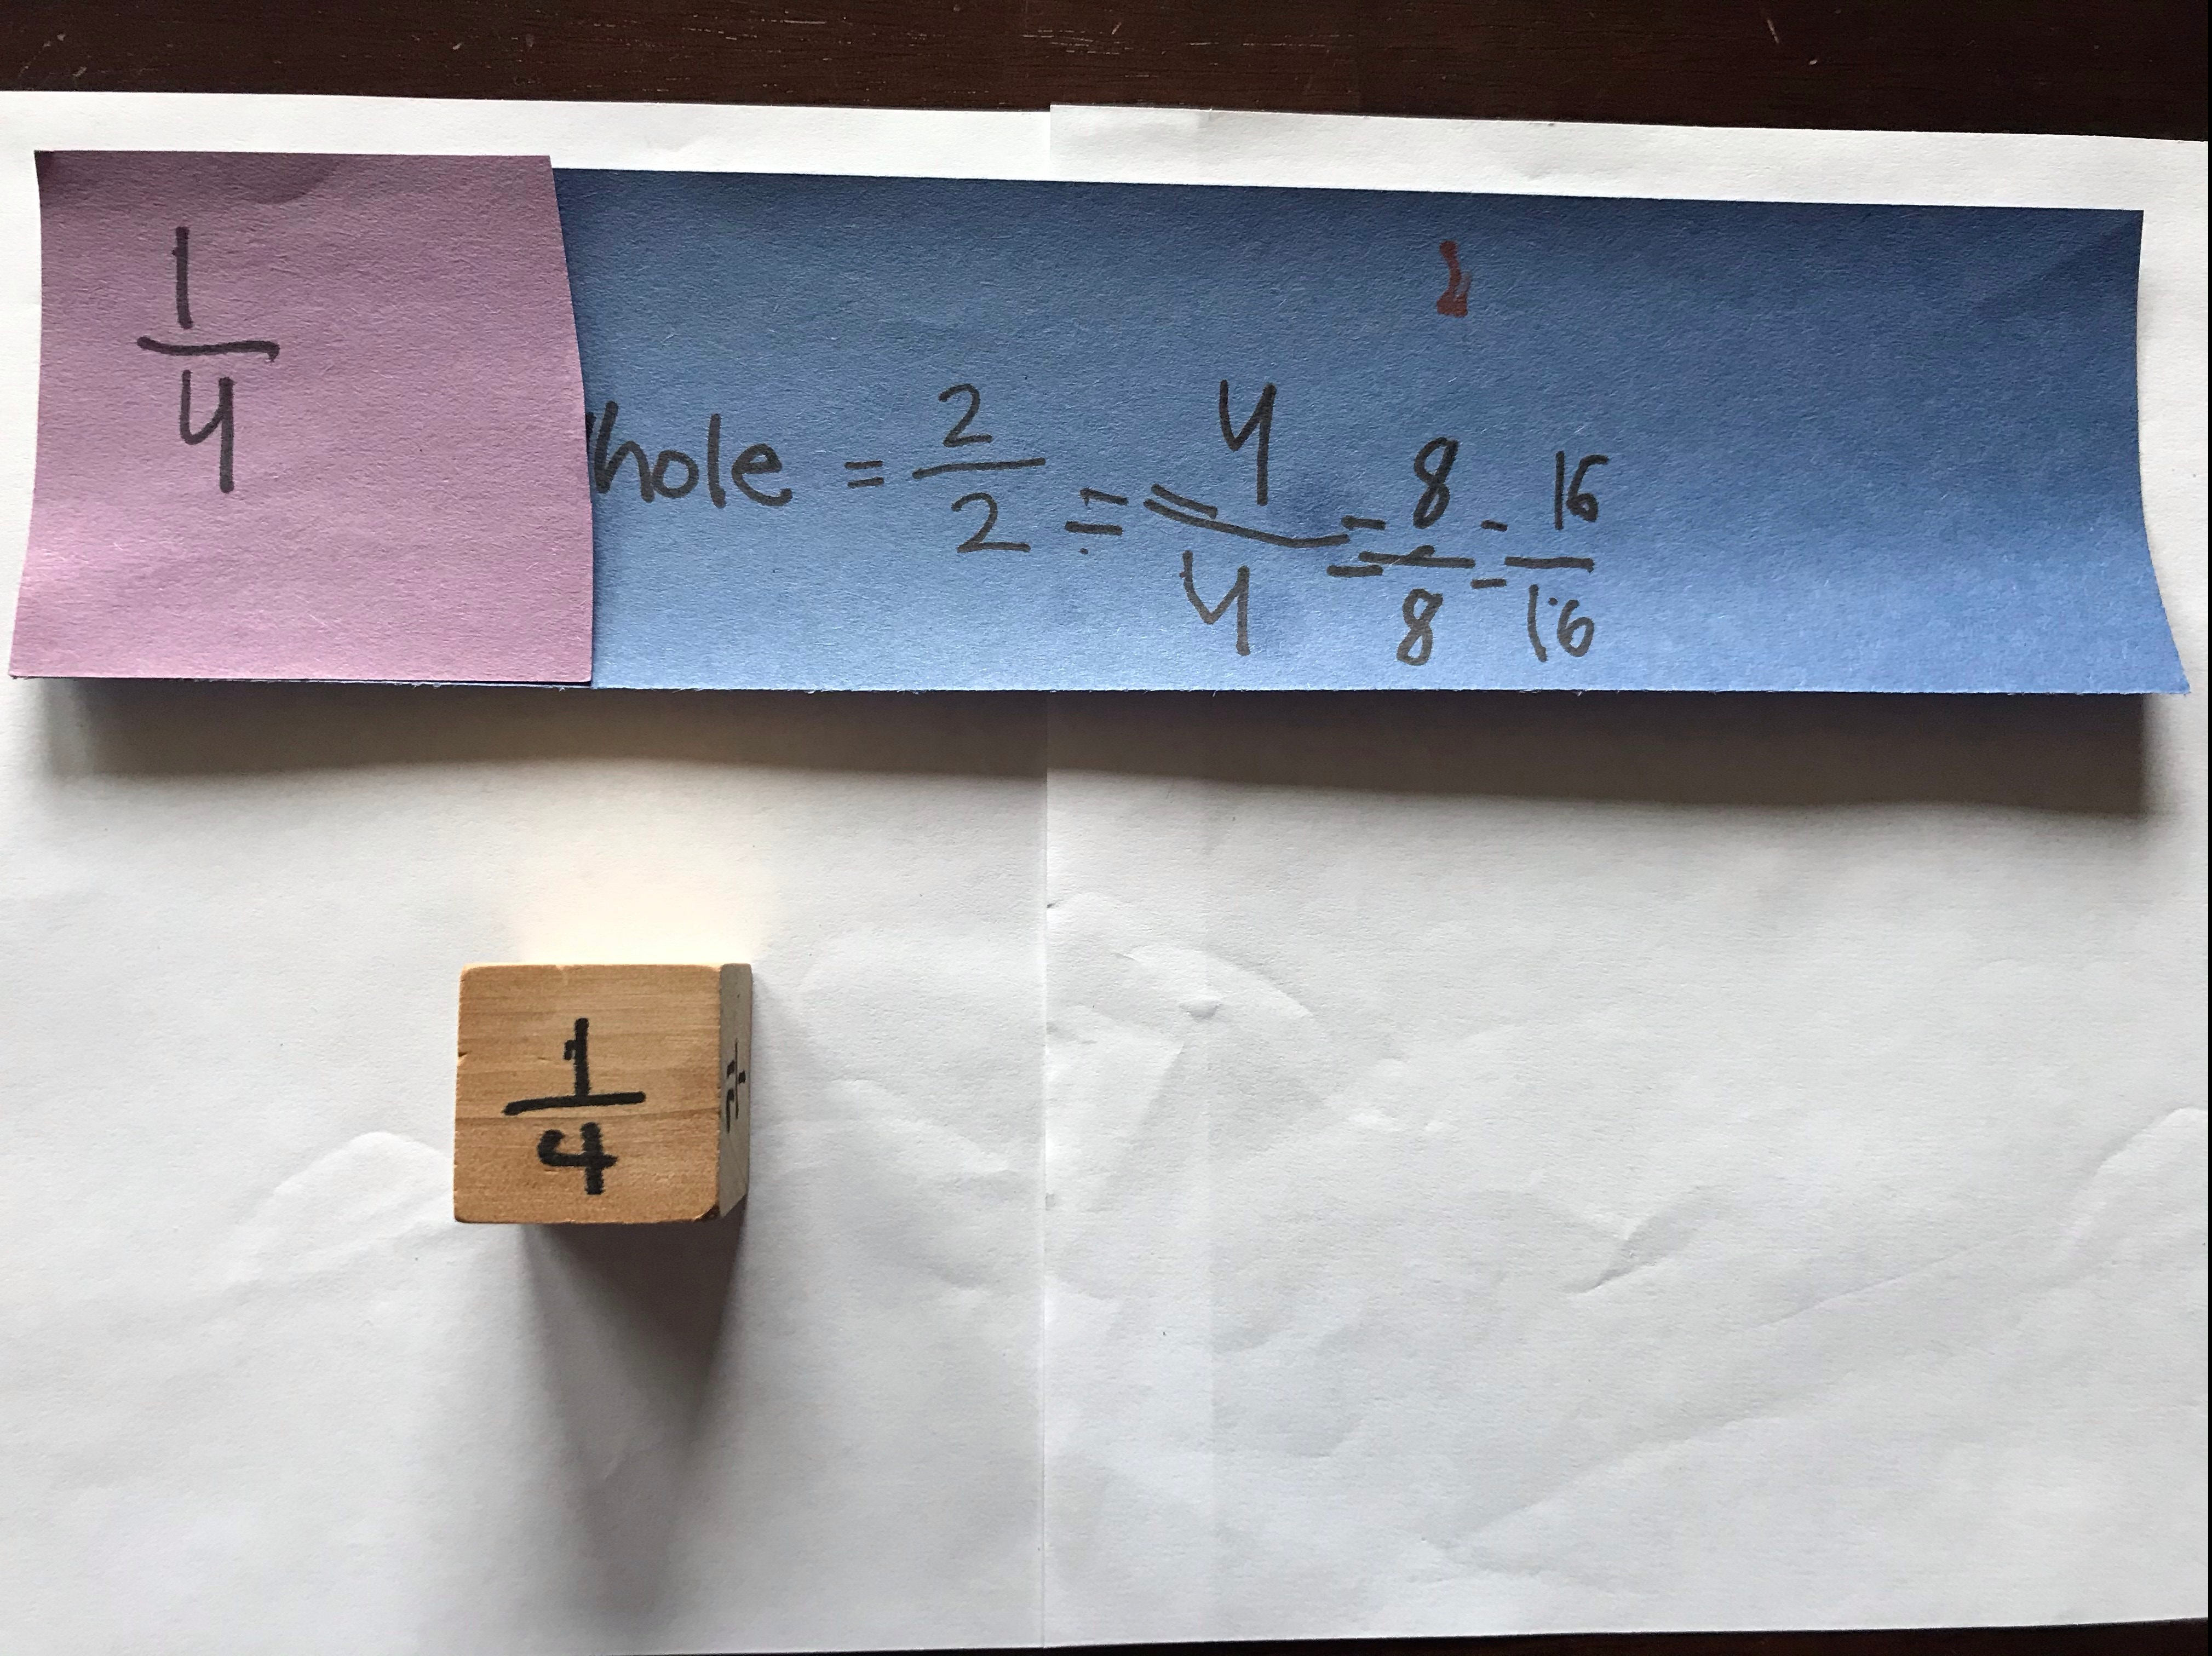
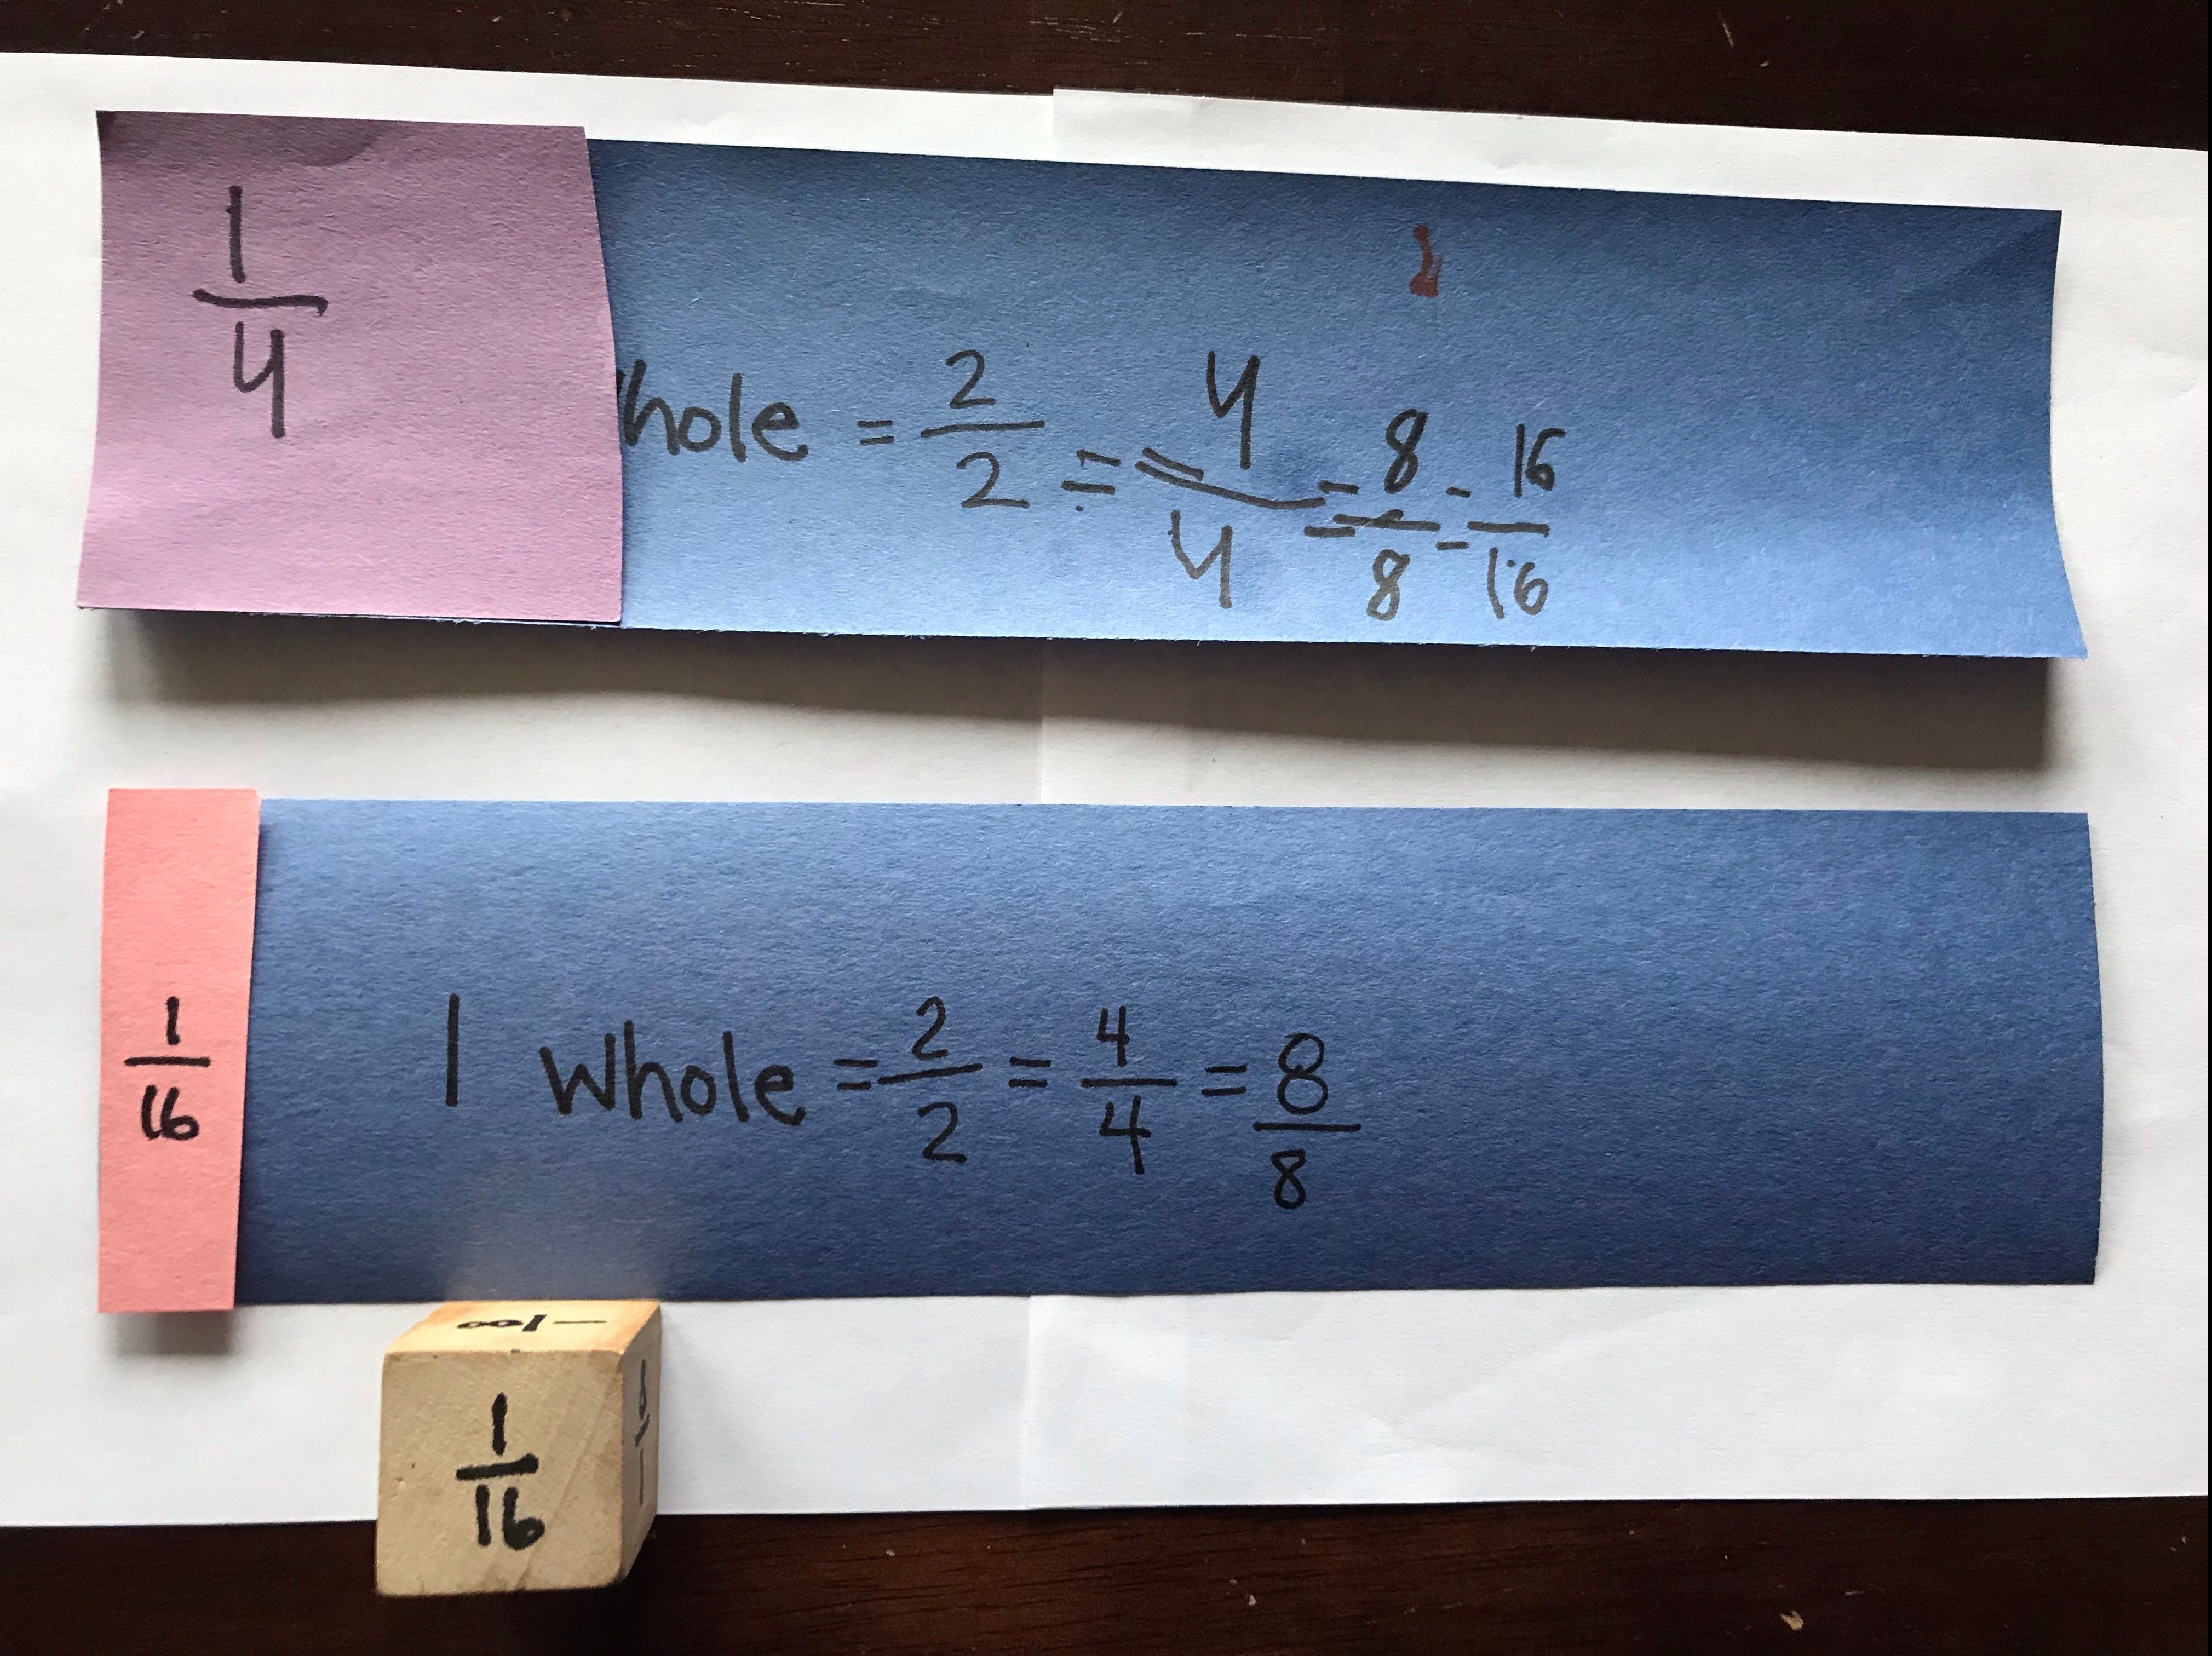 Who has covered up more of their 1 whole? (In our game, Chris had.) How do you know? (Chris originally said, “Because purple is bigger than pink.” I restated, “Oh, so you mean 1/4 is bigger than 1/16?” This helps them start visualizing the size of pieces and prepare for comparing.)


 initely want to use this lesson again, and hope you find it helpful as well!
